
Ensuring jewelry display trays fit properly requires precise measurement, strategic planning and coordination with the design and functionality of your display space. An improper fit could result in wasted space, visual clutter and possibly damaged jewelry if an unplanned approach is taken; for this reason below is a step-by-step guide designed to ensure perfect fits as well as tips for common scenarios (i.e. retail showcases, countertops or trade show booths).
Step 1: Precisely Measure Your Display Space
The first and most essential step of creating an effective display area is taking precise measurements of its dimensions. Do not guess or guesstimate, even minor discrepancies (1-2 cm) can alter how trays sit in your display case. Focus on three key measurements when taking accurate measurements:
- Measure “Usable” Interior Space
Don’t just measure the outer dimensions of your display (e.g., width of showcase); instead calculate its usable interior space – that area where trays will actually rest without getting in their way (excluding edges, hinges or built-in features like lighting fixtures or glass dividers).
2.Example:
Let’s say your retail showcase measures an outer width of 120 cm but features 5 cm lip on either side (to hold glass), the usable width will only be 110 cm (120 cm minus 5 cm + 5 cm = 110 cm).
Consider overhang when creating a countertop display: for instance, if the counter measures 90 cm but requires 10 cm of empty space on each end to facilitate customer access, your usable width is 70 cm. Write these measurements down clearly: width = the horizontal space available to place trays (left to right).
Depth: This refers to the vertical distance from the front of the display to its back (important for trays that could extend too far and block visibility or access).
Height: For stackable trays, measure how tall their internal display is internally (e.g. a showcase shelf with 15 cm vertical clearance).
Note any permanent or fixed elements in the display that might obstruct tray placement, such as lighting fixtures (such as under-shelf LED strips that hang down two cm) and built-in dividers or partitions (e.g. a showcase divided into two sections).
Handles, locks or glass edges (e.g. a display case with hinges that protrude 3 cm).
Example: A showcase with an LED light hanging 2 cm below its top shelf reduces usable vertical space by 2 cm (e.g. from 15 to 13). As such, tray height choices must be made accordingly.
Step 2: Match Tray Dimensions with Your Space
Once you know the dimensions of your display area, use “modular math” to choose tray sizes that will fit securely without gaps, overhang, or crowding issues. Your goal should be a “modular” setup where trays fit side-by-side (horizontally) or vertically (vertically), using minimal wasted space.
Calculate How Many Trays Will Fit Horizontally
Determine how many trays will fit horizontally by dividing your display’s usable width by the tray width you are considering, with an eye towards using whole numbers or combinations that add up to that total width to avoid gaps. As an example: Our showcase width = 110 cm.
If your standard tray width is 22 cm, 110 cm divided by 22 cm is five trays which perfectly fills up this space without gaps between each tray.
If the tray width is 30 cm, this results in three 90 cm trays being too wide to fill the available space (110 cm/36.6). An alternative approach would be pairing three 90 cm trays (in total) with an accent tray (20 cm), to fill this 20 cm gap, or selecting an alternative width such as 27.5 cm, which fits four of them (27.5×4 = 110 cm).
Pro Tip: For easier mixing and matching, standard tray widths (e.g. 15 cm, 20 cm, 25 cm and 30 cm) should be given priority over custom-sized trays which may cost more and limit flexibility.
When stacking trays (e.g., multi-shelf showcases and storage cabinets), ensure their total height doesn’t surpass the display’s usable vertical space. An example would be:
Utilisable vertical space per shelf = 13 cm when accounting for lighting needs, meaning 3 stacks (12 cm total) leave one cm of clearance between them; enough to avoid crushing jewelry or blocking visibility.
Never stack trays exactly to their vertical limit (e.g., 4 cm x 3 = 12 cm in a 12 cm space); allow an extra 1-2 cm for access and damage prevention.
Key Note: For optimal stacking stability, look for trays with flat and uniform tops/bottoms such as acrylic, plastic or padded trays with rigid bases – such as acrylic trays with uniform tops/bottoms or rigid bases made of padded material (e.g. acrylic, plastic or fabric trays with uneven edges may shift or even collapse when stacked).
Don’t overlook depth when fitting trays front-to-back – too deep trays could extending past the front edge of your display and risk damage if struck, or block its back side (hiding jewelry) which would obscure visibility of products within it.
Retail showcases, where customers view from the front, require trays no deeper than the display’s usable depth. For instance, if the usable depth of your showcase is 35 cm, choose trays with depths between 30-35 cm so they sit flush or slightly recessed without overhang.
Countertop displays that require customers to reach over, such as jewelry boutiques, require shallower trays that allow easy customer access. A depth between 15-25 cm works best; deeper trays (i.e. 30+ cm) make it more difficult for customers to grab jewelry from behind.
Step 3: Conduct a Paper or Cardboard Mock-Up before Ordering in Bulk
While precise measurements can help, real world details (e.g. how a tray edge interacts with showcase lips) can often escape notice despite your best intentions. To avoid costly mistakes by testing first: Utilise Paper/Cardboard Mock-Ups as Mock-Ups before purchasing in Bulk
Cut paper or cardboard into the exact dimensions of the trays you are considering and place mock-ups of these in your display space to determine: Overhang (do the mock-ups extend past the edges?);
Space (are there gaps between mock-ups; is there enough room for customers to browse?).
Verify stackability (if stacking, do mock-ups fit under shelves or lighting?) for stackables before purchasing any samples trays (3.2).
If you’re ordering large numbers of trays (e.g., for store redesign), order several samples. When trying them in your display with real jewelry pieces, use these samples as tests: Does the tray fit without forcing itself into too-narrow spaces; can it easily be removed and replaced again (essential for restocking); etc
Does the jewelry in its tray remain visible (e.g., deep trays won’t cover necklaces)? Samples also allow you to test quality (such as material durability) alongside fit – another win/win situation!
Step 4: Tailor Display Scenarios
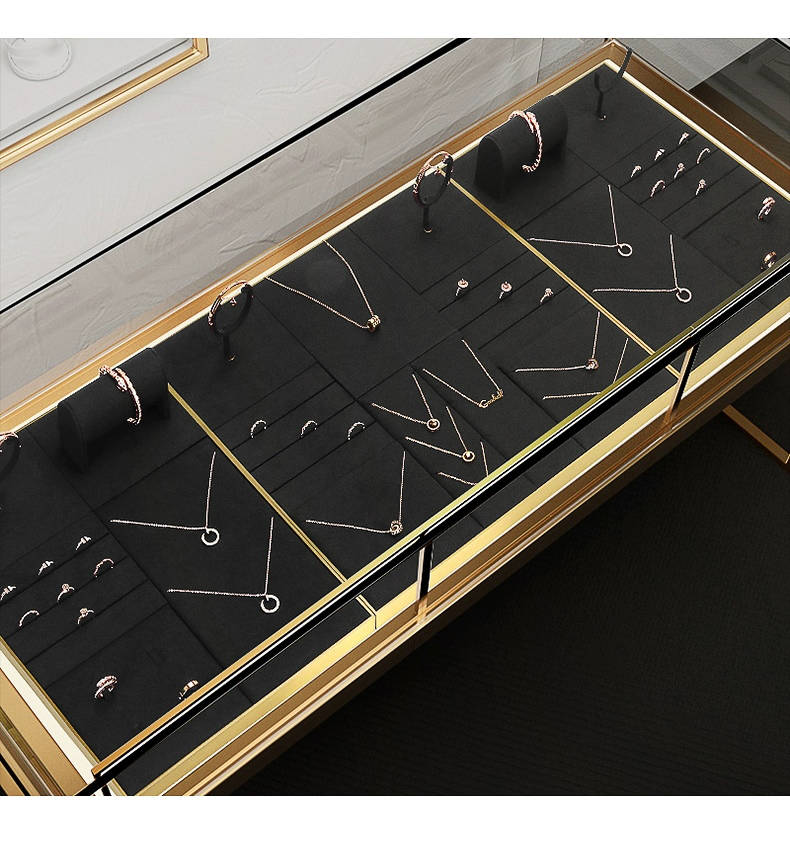
Different display types have specific fitting requirements. Below are tailored tips for the most frequently used setups: The following are examples of typical configurations for retail showcases and their key fit requirements, example tray size recommendations and key fit considerations for retail showcases: 1
Countertop Display – To maintain jewelry visibility, avoid deep trays (max 35 cm). Usable width = 110 cm with 5×22 cm trays for customer access; 13 cm high (3×4 cm tall trays); while 10-15 cm of empty space on counter edges is sufficient.
Trade Show Booth – Use shallow trays (depth 15-25 cm) for easy reaching, with 3 22 cm trays plus one accent tray (4 cm depth or two 35 cm trays). Usable width = 70 cm with usable width comprising of either three 22 cm trays plus an accent tray (4 cm depth) or two 35 cm trays (or 3×35 cm trays). Wedge the portable table width between 60-90 cm before fitting your trays on it.
Prioritize lightweight and compact trays (easy to transport). Table width = 90 cm – three 30 cm (without gaps) or four 22 cm trays with two cm total gaps).
Wall-Mounted Cases – To select appropriate dimensions (often smaller than freestanding cases).
Step 5: Plan for Flexibility
To prevent protrusion of protruding objects from the display area, choose slim trays (depth of 20 cm or less). Usable width should equal 60 cm with 2×30 cm trays used together and 15-18 cm depth trays used as depth options. It is wise to choose flexible trays which provide for the necessary maneuverability: for instance trays made of corrugated cardboard offer excellent solutions here.
Step 6: Manage Content Progression
Your display requirements may shift over time as your jewelry collection or sale preparation changes occur so when choosing flexible trays such as corrugated trays will allow changes for easy updates as required – such as adaptable corrugation). Step 7: Manage Content Creation Your display needs may change so choose flexible trays which provide maximum adaptability: corrugation or adjustment options in design are advisable: choose flexible corrugations on corrugations: choose corrugations on shelves made of corrugation plastic can easily move.
Step 7: Arrange Your Display scaun
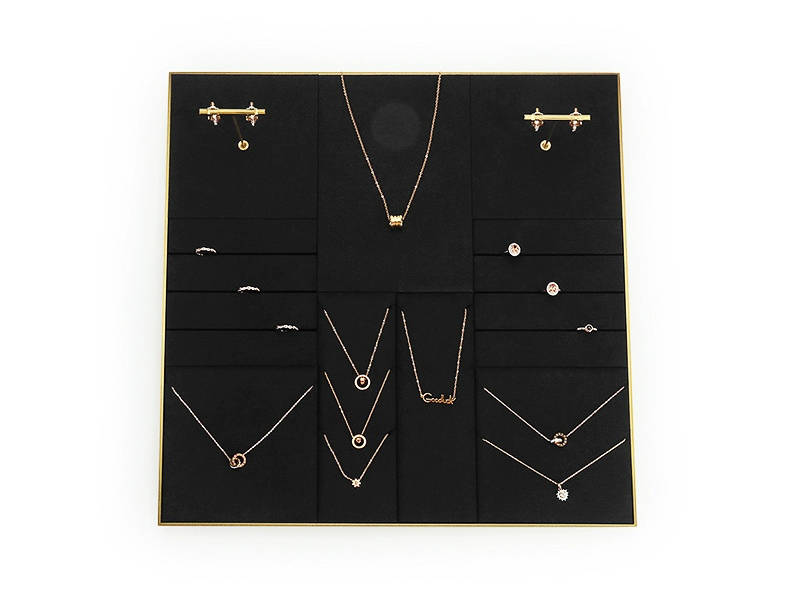
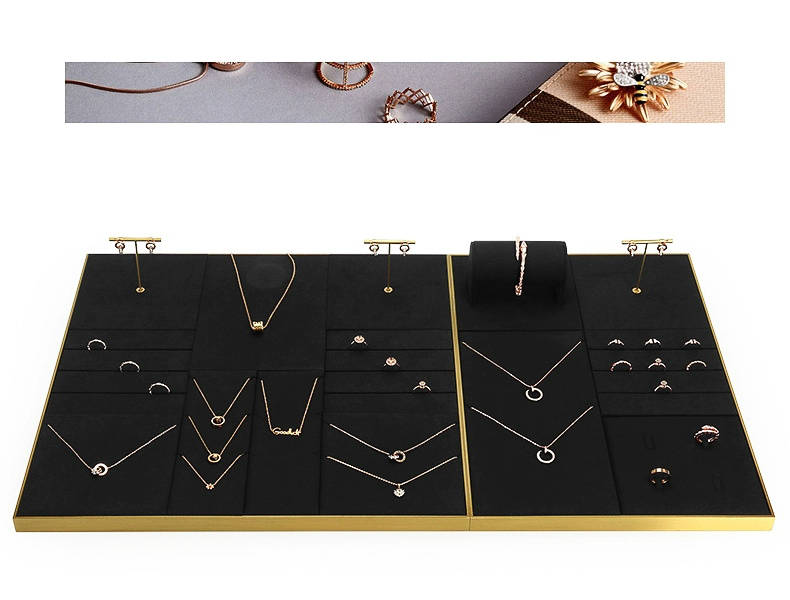
Modular Trays: Select modular trays in standard sizes (e.g. 20×30 cm or 25×20 cm), so they can be combined or reconfigured easily with other trays.
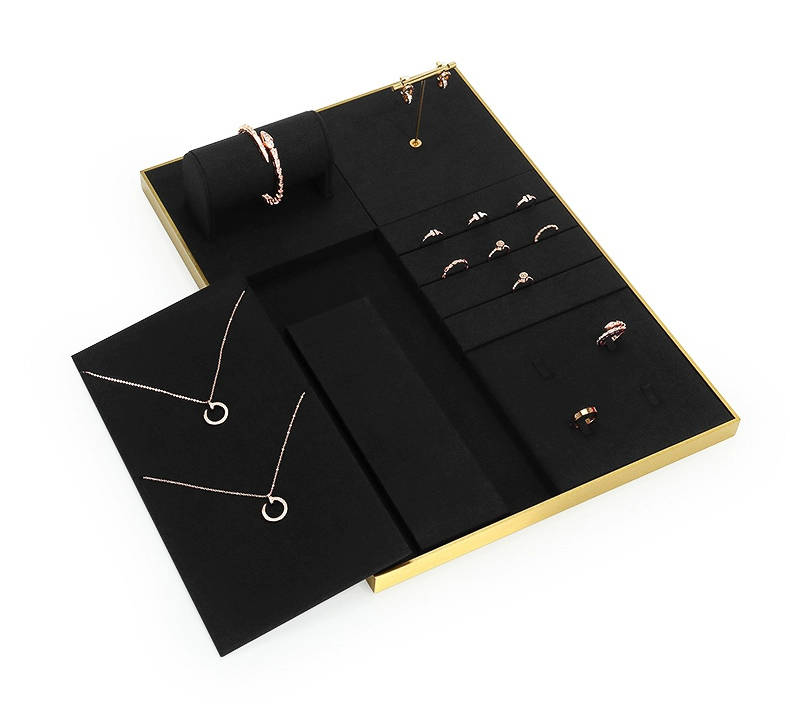
Adjustable Compartments: Some trays offer removable dividers which enable you to resize sections without purchasing new trays, accommodating different jewelry sizes without buying additional sets of storage containers.
Stackable Design: Trays featuring interlocking edges (common in acrylic and plastic trays) remain secure when stacked, but can easily be unstacked if you need to reconfigure the space. Final Check: Conduct a “Fit Audit” When all is set up and secured properly, perform one final “fit audit”. Until that point, ensure they fit securely.
No Overhang: To prevent damage or tipping of displays, trays should not extend beyond their edges (risk of damage and tipping). No Gaps (Unless Intentional): Unexpected gaps (10 cm or larger) make displays appear chaotic–use small accent trays or decor to hide these gaps and give the display an attractive aesthetic.
Easy Access: Customers or staff should easily be able to reach jewelry at the back of a tray without experiencing difficulty in accessing it.
Stable Stacking: When properly stacked, trays should not wobble or shift when touched. By following these steps – such as measuring precisely, testing samples and aligning trays with your display’s individual dimensions – you will ensure a flawless fit that enhances both functionality and aesthetics of your jewelry display trays.